


Have you ever struggled with shadows while chopping veggies or reading recipes? Under cabinet lighting solves that problem. It brightens countertops, making tasks safer and easier. Plus, it adds a stylish touch to your kitchen. Homes with features like this often see increased value, making it a smart investment.
Types of Under Cabinet Lighting
When it comes to under cabinet lighting, there are several options to choose from. Each type has its own strengths, so let’s explore them one by one.
LED Strip Lights
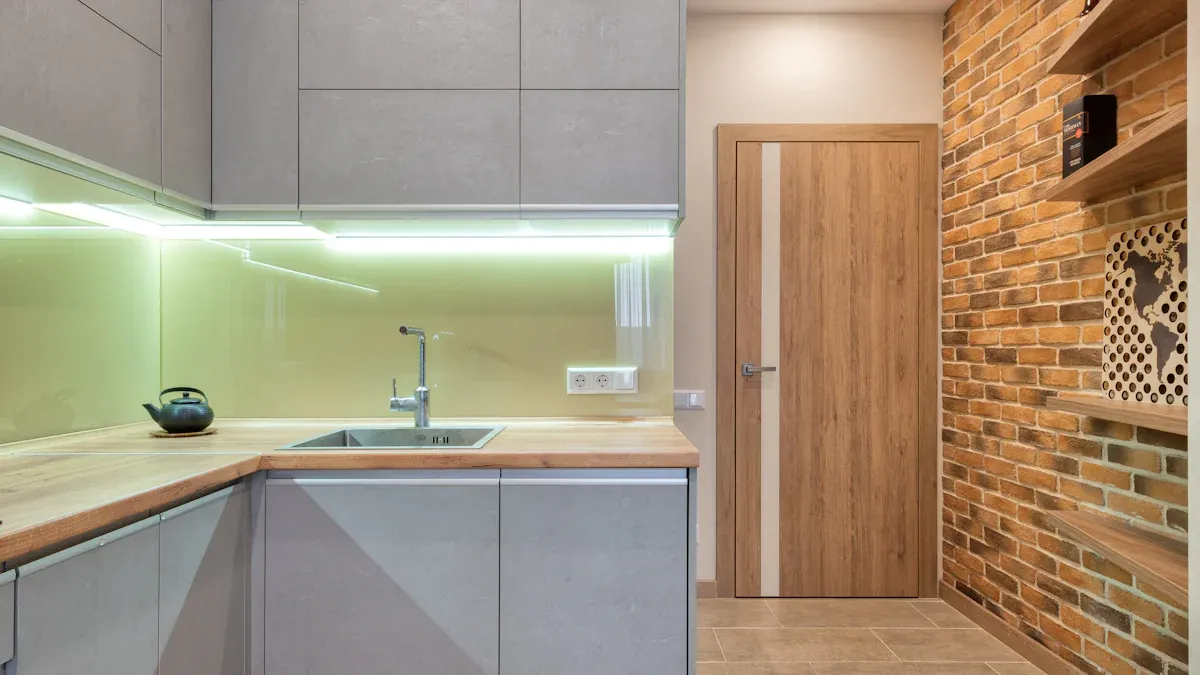
LED strip lights are a favorite of mine because they’re incredibly versatile. These thin, flexible strips can fit into tight spaces and provide even, continuous lighting. They’re also energy-efficient, using up to 75% less energy than traditional incandescent bulbs. Plus, they last a long time—between 25,000 and 50,000 hours! That’s years of use without worrying about replacements. If you’re looking for a modern, sleek option, LED strips are hard to beat.
Tip: Choose LED strips with a brightness of 500-700 lumens per foot for optimal countertop illumination.
Puck Lights
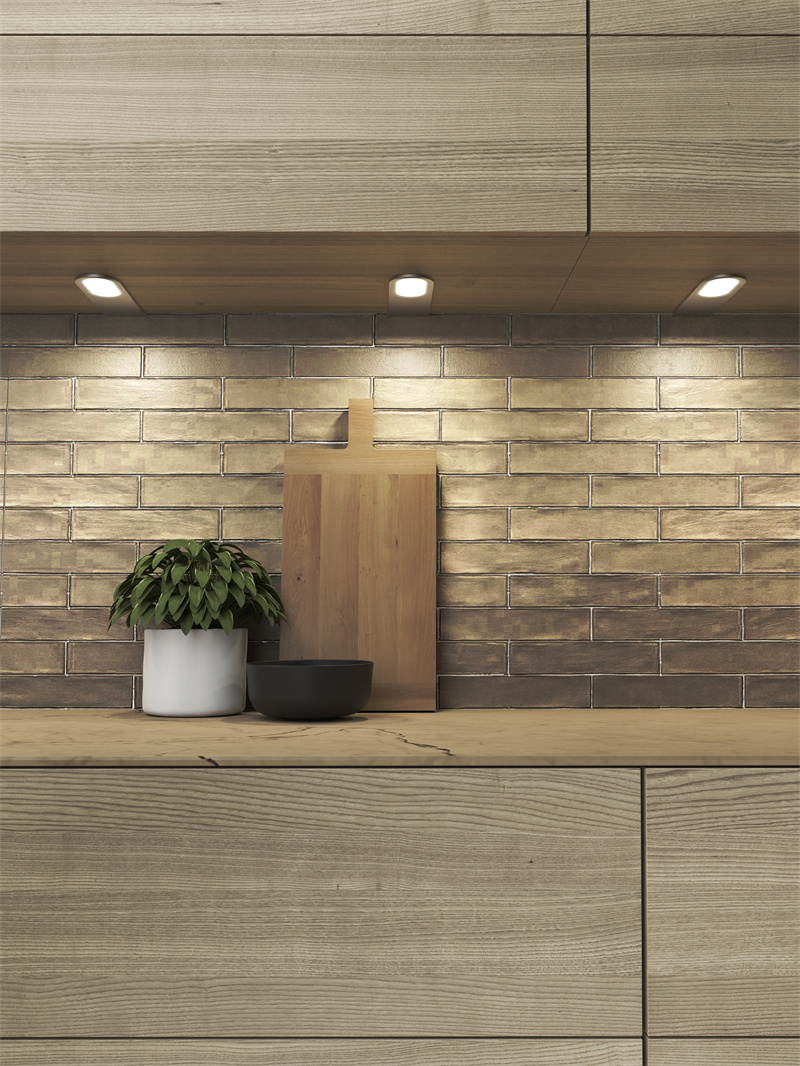
Puck lights are small, round fixtures that create focused beams of light. They’re perfect for highlighting specific areas, like a cutting board or a decorative backsplash. I love how easy they are to install—just stick or screw them under your cabinets. LED puck lights are especially efficient, consuming less energy while delivering bright, clear light.
- Why choose puck lights?
- They’re cost-effective and easy to install.
- They direct light exactly where you need it, reducing waste.
Light Bars
Light bars are ideal for those who want a clean, uniform look. These rigid fixtures come in various lengths, making them suitable for different cabinet sizes. I’ve found them great for eliminating shadows on countertops. Many light bars feature aluminum housing, which makes them durable and easy to clean.
| Feature | Description |
|---|---|
| Sturdiness | Aluminum housing ensures durability in kitchen environments. |
| Length Options | Available in sizes ranging from 6 to 48 inches. |
| Installation Flexibility | Requires precise measurement due to their fixed shape. |
Tape Lights
Tape lights are similar to LED strips but even thinner. They’re perfect for ultra-slim spaces or when you want the lighting to be nearly invisible. I recommend these for minimalist designs. They’re energy-efficient and can last up to 50,000 hours, making them a low-maintenance choice.
Note: Consider adding dimmers to tape lights for adjustable brightness and energy savings.
Fluorescent Lights
Fluorescent lights used to be popular for under cabinet lighting, but they’ve been largely replaced by LEDs. While they provide bright illumination, they have some drawbacks. They consume more energy, produce harsh light, and contain mercury, which poses environmental risks. If you’re upgrading an older kitchen, it’s worth replacing fluorescent fixtures with LEDs.
- Pros: Bright light, affordable upfront cost.
- Cons: High energy consumption, buzzing sounds, and limited lifespan.
Each type of under cabinet lighting has its own appeal. Whether you prioritize energy efficiency, ease of installation, or aesthetics, there’s an option that will work for your space.
Choosing the Right Under Cabinet Lighting
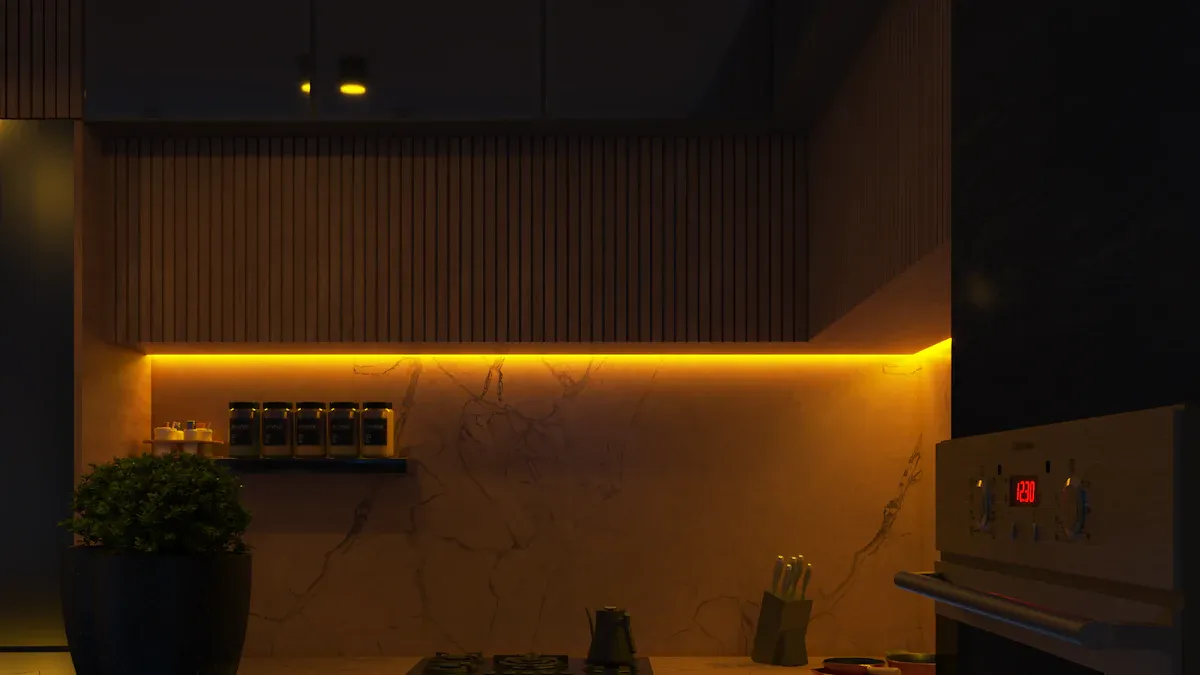
Color Temperature (Warm vs. Cool Light)
When choosing under cabinet lighting, color temperature plays a big role in setting the mood. Warm light (2700K-3000K) creates a cozy, inviting atmosphere, perfect for relaxing spaces. On the other hand, cool light (3500K-5000K) is crisp and energizing, making it ideal for task-oriented areas like kitchens. I always recommend matching the light temperature to the room’s purpose. For example, I use warm light in my dining area for a calm vibe and cool light in the kitchen for better visibility.
Here’s a quick guide to help you decide:
| Temperature (Kelvin) | Colors | Moods Or Effects |
|---|---|---|
| 2700K-3000K | Soft white | Calm, warm |
| 3100K-4000K | Cool bright white | Clean, inviting |
| 4100K-4500K | Bluish white tone | Vibrant, daylight |
Brightness Levels (Lumens)
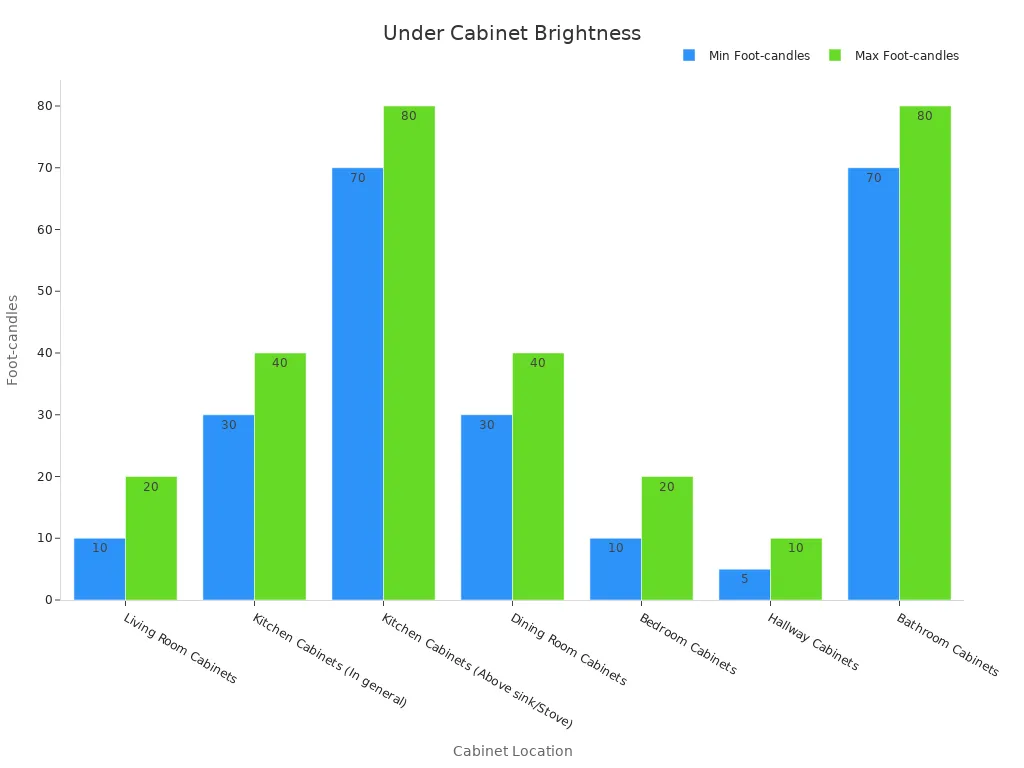
Brightness is another key factor. Too dim, and you’ll struggle to see; too bright, and it might feel harsh. For task lighting, aim for 500-700 lumens per foot. Ambient lighting can be softer, around 150-300 lumens per foot. I’ve found that brighter lights work best over sinks and stoves, while softer lighting is great for general areas.
| Cabinet Location | Recommended Foot-candles |
|---|---|
| Kitchen Cabinets (Above sink/stove) | 70-80 |
| Kitchen Cabinets (In general) | 30-40 |
| Living Room Cabinets | 10-20 |
Style and Design Compatibility
Your under cabinet lighting should complement your kitchen’s style. Sleek LED strips work well in modern kitchens, while puck lights add charm to traditional spaces. I always consider the cabinet color and backsplash design when picking fixtures. For example, warm lights enhance wood tones, while cool lights highlight glossy finishes.
Power Source Options (Plug-In, Battery-Powered, Hardwired)
The power source you choose affects installation and maintenance. Plug-in lights are easy to install and provide consistent brightness. Battery-powered options are flexible but require frequent charging. Hardwired lights offer a seamless look but need professional installation. I prefer plug-in lights for their simplicity, but hardwired ones are great for a polished finish.
| Power Source | Pros | Cons |
|---|---|---|
| Battery-Powered | Flexible, quick installation | Frequent charging |
| Plug-in | Easy to install, bright | Requires nearby outlet |
| Hardwired | Seamless, professional look | Complex installation |
Step-by-Step Installation Guide for Under Cabinet Lighting
Planning and Measuring Your Space
Before diving into the installation, I always start with careful planning. It’s essential to measure the length of your cabinets and the space between them and the countertop. This helps determine the number and type of lights you’ll need. I like to use a tape measure and jot down the dimensions. Once I have the measurements, I mark the exact spots where the lights will go using a pencil. This ensures everything is evenly spaced and aligned. Trust me, taking the time to plan saves a lot of headaches later!
Tools and Materials Needed (Drill, Screwdriver, Wire Strippers, Tape Measure)
Having the right tools on hand makes the process much smoother. Here’s what I typically use:
- Essential tools: Drill, screwdriver, wire strippers, and a tape measure.
- Optional tools: A level for straight alignment and safety glasses for protection.
For materials, I recommend LED strips or puck lights, depending on your preference. Don’t forget wire connectors, screws, and a power supply.
Tip: Keep a flashlight nearby if you’re working in a dimly lit area.
Preparing the Surface for Installation
A clean surface is key for a secure installation. I always wipe down the underside of the cabinets with a cloth and some denatured alcohol. This removes grease and dust, ensuring the adhesive or screws hold firmly. If you’re using tape lights, this step is especially important.
Wiring and Connecting the Lights
Wiring might sound intimidating, but it’s manageable with a bit of patience. For plug-in lights, simply connect them to an outlet. If you’re hardwiring, turn off the power first. I follow the manufacturer’s instructions closely, connecting the wires using connectors or soldering them if needed. Safety is my top priority here—double-checking connections prevents future issues.
Mounting the Lights Securely
Once the wiring is done, it’s time to mount the lights. For LED strips, I peel off the adhesive backing and press them firmly onto the cabinet. For puck or bar lights, I use screws to secure them. A level helps ensure everything is straight.
Testing and Adjusting the Lighting
Finally, I test the lights to make sure they’re working. If something’s off, I troubleshoot the connections or reposition the fixtures. Once everything looks good, I step back and admire the transformation. Under cabinet lighting truly elevates the space, both in function and style.
Cost and Time Considerations for Under Cabinet Lighting
Average Cost of Materials and Installation
When planning for under cabinet lighting, it’s important to know the costs upfront. Materials like LED strip lights or puck lights typically range from $20 to $50 per fixture. If you’re going for high-end options, like smart lighting systems, the price can climb to $100 or more. For a DIY project, you’ll only need to budget for the lights and basic tools. However, hiring a professional for hardwired installations adds labor costs, which can range from $200 to $500 depending on the complexity.
Tip: Always compare prices online and in local stores to find the best deals.
Time Required for DIY vs. Professional Installation
Installing under cabinet lighting doesn’t have to take all day. A simple plug-in or battery-powered setup can be done in under an hour. Hardwired installations, on the other hand, might take 2-4 hours if done by a professional. I’ve found that DIY projects save time when you’re using easy-to-install options like adhesive LED strips. But if you’re not comfortable with electrical work, hiring an expert ensures safety and quality.
Budget-Friendly Tips for Saving Money
You don’t need to break the bank to upgrade your kitchen. Here are a few tips I’ve used:
- Opt for energy-efficient LED lights to save on electricity bills.
- Look for multipacks of lights—they’re often cheaper per unit.
- Reuse existing outlets to avoid the cost of additional wiring.
Note: DIY installations can save you hundreds of dollars, especially for simpler setups.
Under cabinet lighting is one of the easiest ways to upgrade your home. It’s practical, stylish, and makes everyday tasks so much easier. I’ve seen how it transforms a space, and I know you’ll love the results too. Why wait? Start your project today and enjoy the glow!
FAQ
How do I choose the best type of under cabinet lighting for my kitchen?
I always start by considering my kitchen’s style and needs. For modern kitchens, LED strips work great. Puck lights add charm to traditional spaces.
Tip: Match the lighting type to your cabinet size and layout for the best results.
Can I install under cabinet lighting without professional help?
Yes, absolutely! Plug-in or battery-powered lights are perfect for DIY projects. Hardwired installations might need an electrician if you’re not comfortable with wiring.
How do I maintain my under cabinet lighting?
I clean the fixtures regularly with a soft cloth to remove dust and grease. For LED lights, I check connections occasionally to ensure everything works smoothly.
Note: Avoid harsh chemicals that could damage the lights or adhesive.
Post time: Mar-24-2025